In this feature-length article Grunge Type is looked at a little more thoroughly than most who employ such fonts would think to do. While there isn’t anything wrong with type that has been beaten and broken, there is definitely an issue with most of the fonts that are put under this category. Let’s have a look at how to do it well and how to give your headings real world grunge character.
In theory, grunge fonts are lovely things, aren’t they?
They can be used to help give a feeling of tangibility—this piece of text, these words and their message have gone through hell to meet us. Through their beaten but still standing shapes they give a sense of longevity, all while having an air of the modern to them.
The real charm of these cracked letters is a result of our ever refined culture—the computer affords the designer the ability to make all the lines straight, all the circles perfect. Yet here are these forms that aren’t clean and neat and shiny. They serve as a break from our gloss screens and polished metal. They’re almost organic in a sense.
Or at least that’s their goal – to look as if they exist outside of the realm of pixels and vectors. If the computer makes things perfect, the real world gives it character. And this is what grunge fonts try to achieve – a sense of character and charm.
Too bad that this is almost never truly the case.
It’s all theory and principal, isn’t it? The reality is that these fonts have two major failings:
- If there is the same letter twice in the text of which they’re setting, it looks dreadful
- They’re almost never applied properly
And that’s the good grunge fonts, which are few and far between.
Fool me twice, shame on you.
Two letters in the same piece of text is the sturdiest nail in the coffin of the grunge font.
And the charm spoke of earlier? It’s lost when the type is what is looked at rather than the letters. It means people aren’t reading.
When a good font is used to set headings, body, captions or whatever, you don’t notice it—you read the words and get a feeling of what they’re saying through the type, but it happens subconsciously. When you see a text set in Bembo, you don’t consciously think ‘classic font, must be classic text,’ you think ‘classic text’.
Our minds love repetition. It’s why we love the grid in our designs. A repetitive pattern makes something easier to remember. It makes the odd stand out.
When your eyes fall upon a heading set in a grunge font with the letter e found twice, and both have a chunk removed from the same spot that makes the counter a funny shape and twice the size it should be, you’ll stare and inspect. You won’t read ‘medicine’, you’ll think ‘oh, look at the two e’s in medicine’. It might happen in less than a second, but this observation will set your mind into overdrive as you read the text, searching out the same odd shapes over and over.

Stop Sitting On Me.
The second issue I often have with these fonts is that they are used in the wrong context. A well chosen font will set your message within the design. Not on top of it, not below it.
The font needs to match the mood of the text and the layout mustn’t get in the way of it.
By design, grunge fonts are noticeable. They stand out because they’re different. If you’re design doesn’t accommodate this, or if it ignores it completely, the contrast between the mood of your design and the type will be so strong that they will push each other apart.
The type and layout must be sewn together, with texture and seemingly dystopian design as the thread.
Following on from a point of a previous thought on good fonts not being noticeable, the same should be said of the layout.
I’m not talking about the design as a whole being unnoticeable, that’s just madness. What needs to remain invisible until inspection is the relationship between the type, image and illustration within the design.
A super-bright and bubbly photo isn’t going to work well with a grunged up font. The best photos are the gritty ones, the noisy ones. The ones that compliment the emotion and tone of the font.
The biggest misinterpretation that many designers, especially the inexperienced, have is that because these fonts are rough, the layout and execution should also be rough.
An example of bad topic and misguided
ideals on grunge design

How often have you seen this kind of foolishness? While this is an extreme example more likely to be seen done by someone who just wants to put up a poster rather than a graphic designer, there are many, many, many graphic designers (hi 95% DeviantArt!) that seem to not go many levels above the quality of this awfulness above.
A silly mistake.
If anything, these kinds of layouts deserve as much attention, if not more, as the extremely corporate. If special care isn’t taken, if the grasp of the designer on the attention needed isn’t tight, noticeable and ugly repetition and poor decisions will sneak in.
The principals and elements of design always work strongly, regardless of medium, message or voice.
No more tech.
As a general rule, don’t use grungey, distressed fonts. You can’t crash the car if you don’t drive it.
Alright, so that’s a little over the top, but most of these fonts are horrible concoctions. I say concoction because they’re made from well crafted fonts that are abused and slashed and beaten haphazardly. The font from which they came deserve more care than that.
A good font takes years to finish. A couple hours of warping each letter to grunge it up then packaging it as a font is a little disrespectful, isn’t it?
Duplicate letters of grunge suck and are to be avoided, we’ve gone over that. So what to do about it then?
With the dependence many of us have on technology, this might come as bit of a surprise, but here we go – get off the computer.
Forget the Photoshop tutorials that give no craft and are too polished with their flavor-of-the-month style. Use your hands, get them dirty and allow them to lust for the grit and the grime. Of course this isn’t the only way to develop this look, it can obviously be replicated to a beautiful extent on the computer. But my typography classes taught me to work with my hands first, then get onto the computer – so for the sake of this article, that’s what we’re going to do.

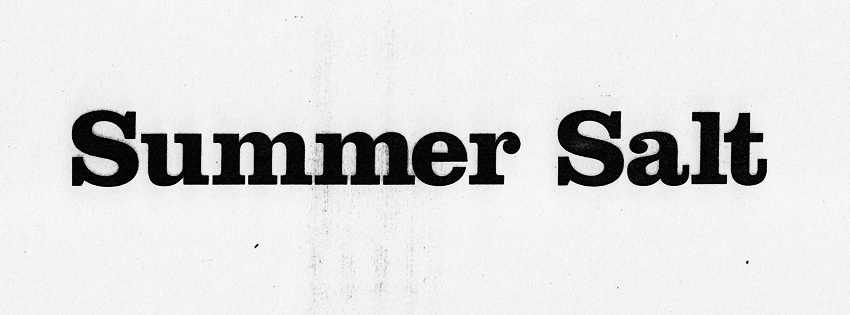
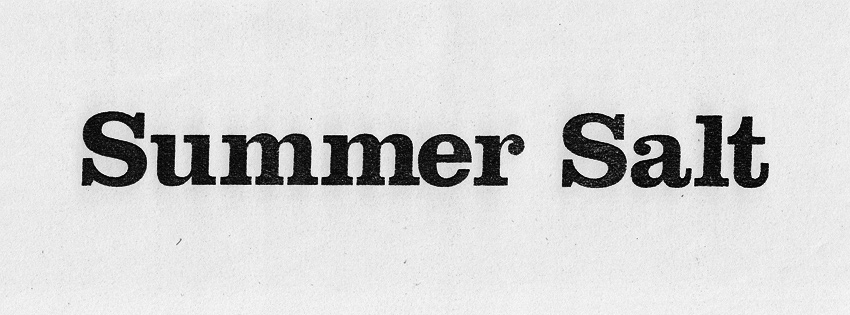
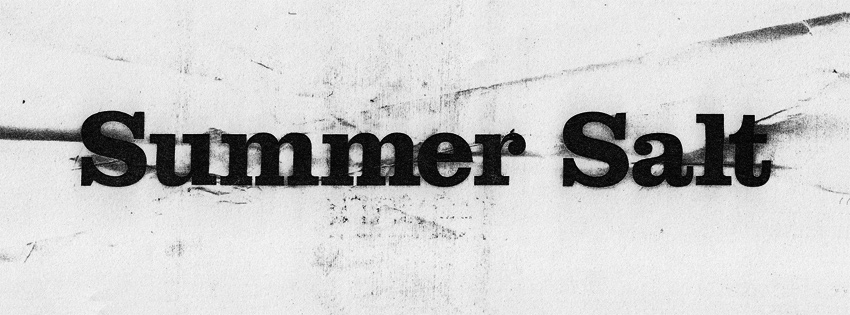
We’re going to focus on a heading we’ll use in a design later on. Remember, this is to give a real world grunge look to a text that’s going to serve as a header for content that deserves such a typographic feel. What better than a surf graphic?
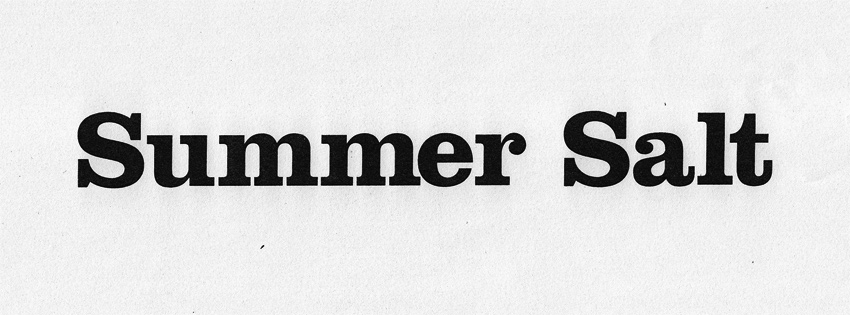
Type and kern your text in a strong typeface that works well for your message and print it out. Print a few copies, you’ll need them.
I’m not a massive fan of tutorials in general, so instead of giving you step by step guides on how to gritify your type, I’m going to give you a few examples and some ideas to get you started instead.
I only have access to last printers at the moment, so that’s what I’ll focus on.
Photocopier
Oooh, do I love a bad photocopier! The older the machine, the higher the contrast and dirtier the print, the better.
Here are a few tricks I’ve picked up on how to add a little grit and grunge and grime to headers.
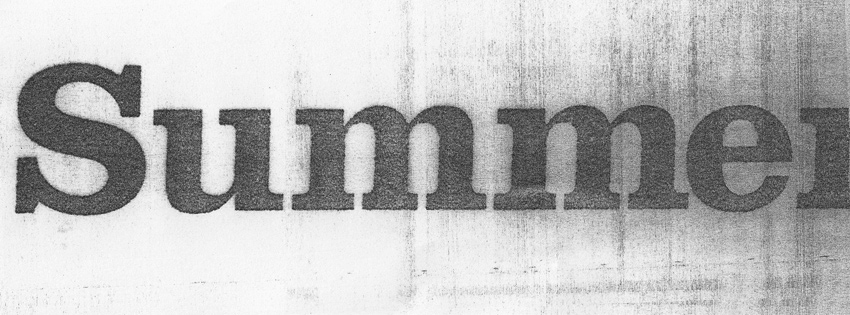
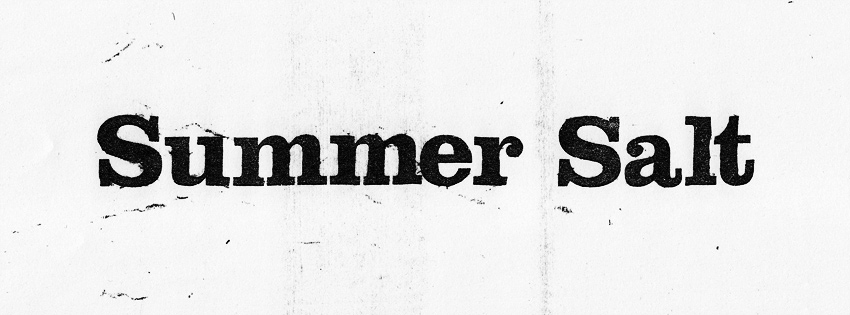
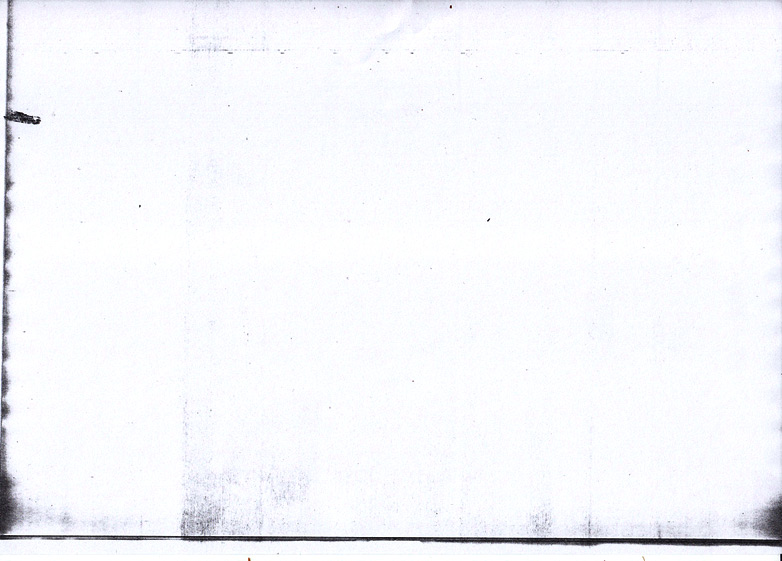
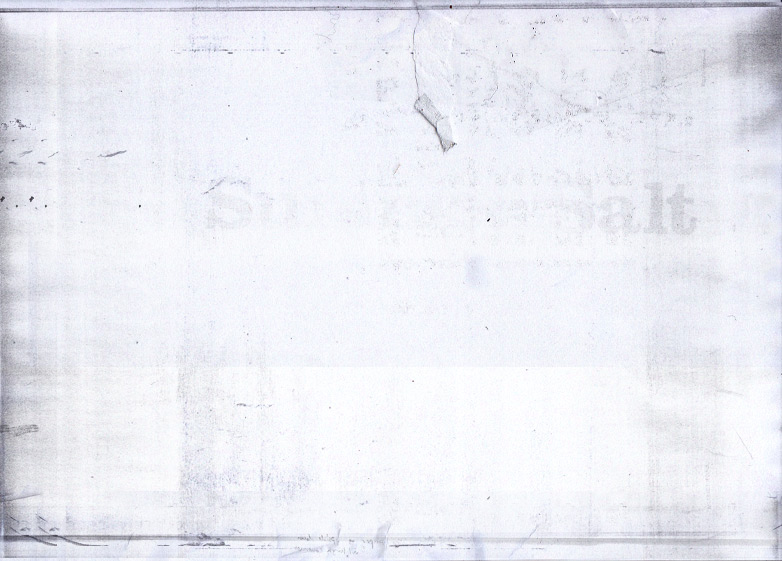
Copy and scan. Starting off easy, but it’s a lovely effect.
The real beauty of this one can be seen when you look at the larger image. The photocopier I used wasn’t a very good one, which is how I got the beautiful texture around the second m and e.
Copy with a high contrast.

This might seem a little extreme, but it can be used to great effect once you get it into Photoshop and adjust the levels. You might not use this as it is for the heading alone, but if you layered it over the top of a cleaner copy and explore the blending modes, a little magic might happen.
Copy of a copy.
Exactly what it sounds like, this is a copy of a copy. The effect is a lot more subtle than a straight copy as a lot of the midtones are ripped from the image but the solids start to get a little textured.
Run the same sheet through twice.

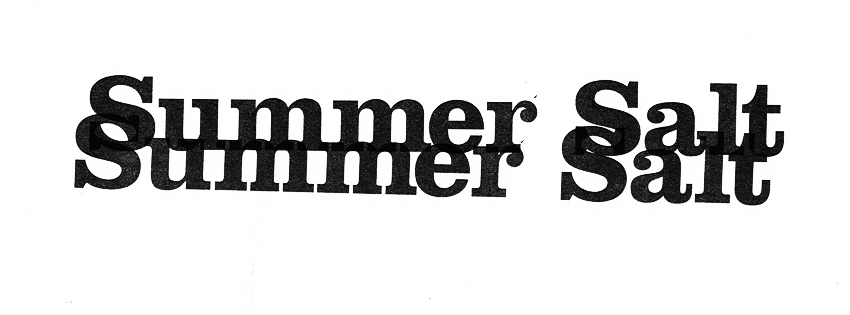
Crave the bad alignment, enjoy the fact that it’s out of your hands for a moment.
In the first one, the alignment is almost perfect – we’re left with only a slight halo, which if printed at a decent size, looks quite nice. The second is clearly way off (was a mistake actually) but is interesting and could work well. However, you wouldn’t want to do much more to it as the doubling up of the heading is probably enough working with the text as you’d want to do – too much texture on this one would make it start to look tacky and overdone.
Blow the type up to 400%
Ohhhhh yeah, 400% increase. Clearly the photocopier didn’t like this one, but look at the edges of the letters! The roughness is fantastic, isn’t it?
Shrink down to 20% and scan at a high resolution.

The point in making it smaller is that a lot of the finer details are lost and the natural grit of the photocopier will be more pronounced.
Shrink it down to 20%, then back up to 200% of original.
That natural grit and finer lost detail mentioned before? It all becomes a lot more obvious when you blow it back up to 200%.
Reverse with high-contrast
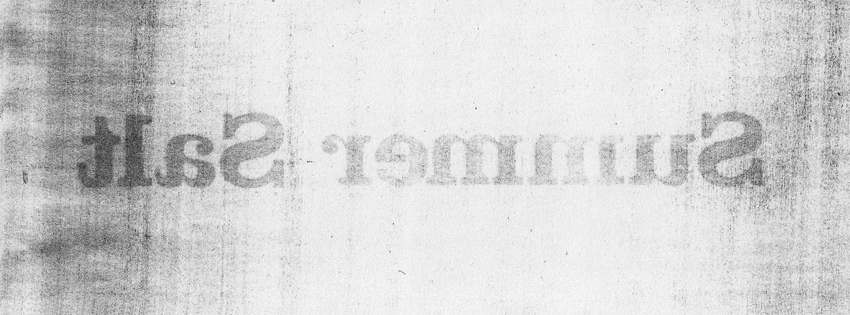
This is a fun one. Turn the paper over so the back is against the glass of the copier, pump up the contrast and let her rip. You’ll get a very faint backwards copy, but it’s gritty to hell and has a great texture to it, good for overlaying with a bad alignment.
Sticky tape


The thing about toner is that it doesn’t sink into the paper—it stays on top, making it removable, which can be an awful lot of fun.
Get some weak masking tape, apply it to your type (holding one end) and pull it back from the paper—rip, rip, rip! Pull up that toner and expose your letters to a little bit of character in a daze of creative energy. Really, just go nuts.
If you can find a weak sticky tape that is transparent it’s worth using that. It allows you to put the tape back onto the paper and scan in the grit that it’s pulled off, meaning the marks available will be uniform—what’s missing from the letters is present in the background elsewhere.
Scrunch Up


Take your pieces of paper and scrunch it up into a small ball. Unfold and photocopy with high-contrast. The photocopying gets rid of the middle grays and makes breaks in the text look stronger. Plus the photocopier will add and remove a little bit of its own texture too.
Or scrunch it up to a small ball, with the toner—your type—on the outside. Now rub the corners and folds with exposed type on some concrete or use some sandpaper. Any fine, gritty surface will do as long as it can scratch away the toner.
The top shot here is a scan of it folded out again and flattened, the second image is a photocopy and the third is a photocopy with the contrast pumped up.
Scratch


For this one, I rubbed the print up against the corner of some brick and scratched away the toner. It’s generally a good idea to go in the same reading direction as the text for most of it, but adding one or two vertical strokes can also create a bit of interest, just don’t go overboard.
The first is a scan of that piece of paper and the others are photocopies of it, with varying degrees of contrast.
Harsh Fold


Fold the paper and make the creases very strong and firm by running your fingers over them tightly repeatedly. Go for crazy angles and overlapping folds as they’re not going to be very obvious.
The first image above is a straight copy of a fold and the other three are photocopies of various types.
I won’t go on and on, but you start to see my point, don’t you? If you want beaten type, then beat the type.
The two major benefits of the above are;
- Not every instance of each letter looks the same.
- And more importantly, each letter’s crack and scratch follows onto the next naturally—the whole word is given character, not just each letter.
My favorite thing about all this is that you lose control—it isn’t wholly up to you what parts of what letter gets scratched or how much toner the tape will rip up. The more you stay out of the way, the more unique the letters and character-rich your text will be.
Of course, the issue with all of the above is that you’re type isn’t editable. A bit of a problem. So you’ll need to be sure of your kerning and spelling before you start, or you can cheat.
(And how to cheat? Get a texture, place over/under your text and go nuts with the blending modes. And that’s all I’ll say about that at the moment.)
Making it work with your layout.
Now that you have your type, you need it to work with your layout.
They key is to have it appear within the design. An easy way to of doing this is to use the background grit and scratch and noise from the whole page your type is on, as well as your other attempts using the same method.
Photocopies are the best example. If you’ll look at the image below, you’ll notice a fair bit of random marks on the sheet. These are what you’ll use to stitch it together.
Use these as your canvas. Make up a Photoshop document with several layers of these, all on multiply/darken.
And again, losing control a little, don’t move every little mark around. Let it lie where it lands when you place/resize the layer to fit the canvas. Use whatever little bits and pieces of texture you can find.
The reason it’s a good idea to use the same textures made in the same way as your type was changed, is because of the similarities. What your adding to the canvas and what was taken away from your type will reflect well upon one another—it helps marry the type to the page.

The above is three layers of our heading merged together, bring and removing elements from each. Where ever you can, craft the text together when using more than one letter. Don’t just put them ontop of one another and make the blending mode multiply. Look at each layer and figure out what it is about each you like. Mask some bits off and make others more pronounced.
As you bring in photos and illustrations, ask yourself if the character of these new elements work with the character of your page and your text.
As mentioned earlier; noisy, slightly desaturated or highly contrasted photos generally work best – you may need to gently manipulate a photo to work, but make sure that all the elements look good and work well with the overall design, not by themselves.

To be broken.
The is a guide, at best. All of my suggestions can be broken to great effect. But as it goes, to break the rules, you must know them. If you really understand that and know where I’m going from with all of this, then take what I say with a grain of salt. If you don’t, take it as gospel for the time being.
The real trick to using grunge fonts well is to have them be a part of the design. Not an add on. Nor a superficial underlying lust you have for whatever is stylistic at the time, but a true reason to have your whole design reflect the character of the copy—the goal and purpose of the project—which would be served well to use this grit.
If the copy, the images, and the reason behind the job reflect a gritty and grungey nature, then you’re half way there. A broken series of letters will work well.
Master Your Craft.
Weekly.
Become the designer you want to be.
Join a group of talented, creative, and hungry designers,
all gaining the insight that is helping them make
the best work of their lives.